Transcribing Rhythms
Once you’ve determined key and meter, it’s finally time to move to staff notation! First, make sure that the first line of your notation begins with the relevant clef, key signature, and time signature. (If it helps you remember the correct sequence, these are in alphabetical order—even if you call it a “meter signature” instead.) If you end up needing additional lines of notation, the clef and key signature are typically repeated on every line; because beaming often does a pretty good job of clarifying the meter, the time signature is usually only written at the beginning of the music and anywhere it changes.
Then we’re ready to start with rhythm and meter. In our experience, this is a little bit more helpful than starting with pitch. Of course, when actually doing full transcriptions, you will likely go back and forth between rhythm and pitch.
Notation of rhythms always depends on the meter, so it’s important to make sure you’re orienting to the meter first! The steps are reviewed below; click to expand each step for additional advice.
When working out a rhythm, start by memorizing a portion of the melody. Replay this portion in your head, perhaps slowing it down, while tracking the meter. As you do so, pay attention to where each note falls with respect to each beat. For example, you might notice that a long note starts on beat 3 and continues halfway through beat 4, or that beat 1 consists of three notes in the relationship long-short-short. It may be helpful to sketch this information out in rhythmic protonotation.
If you’re having trouble, it will likely be helpful to track the beat and/or its divisions with physical motions. You are encouraged to use hand taps, arm waves, foot taps, or head nods to track the beat, and finger taps to track divisions of the beat (2 fingers for simple, 3 for compound). For some people, relating the rhythms to the beats accurately takes a lot of practice. If that’s you, be patient, practice your rhythm skills, and work with someone else if available.
Once you’ve figured out how the rhythms relate to the beat, you can figure out the correct notation by using the bottom number of the meter sign as a point of reference. If you have used a simple meter signature, the bottom number will designate the note value that represents the beat. If you have used a compound meter signature, the bottom number will designate the note value that represents the beat division. Choosing appropriate note and rest values will be a matter of adding, subtracting, multiplying, and dividing from these points of reference.
Finally, make sure to clarify the meter in your notation by using beaming where appropriate. The general rule of thumb is that beams should join together notes smaller than a quarter note when they lie within the same beat; examples can be found here.
Examples of rhythmic transcription
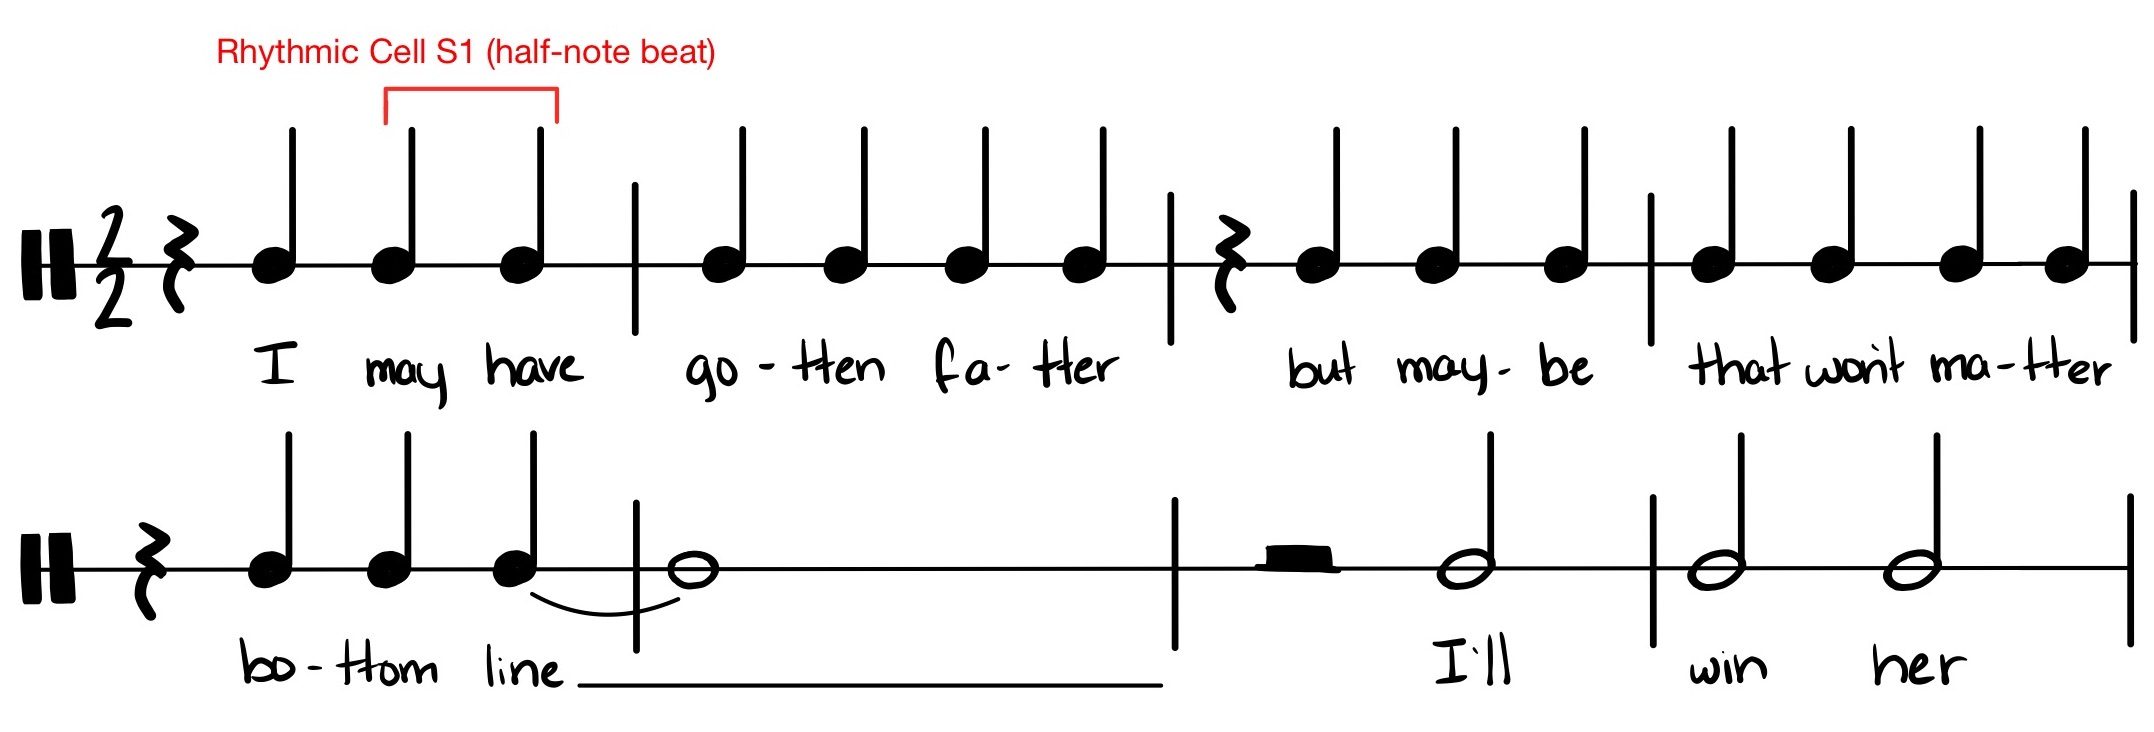
Simple:
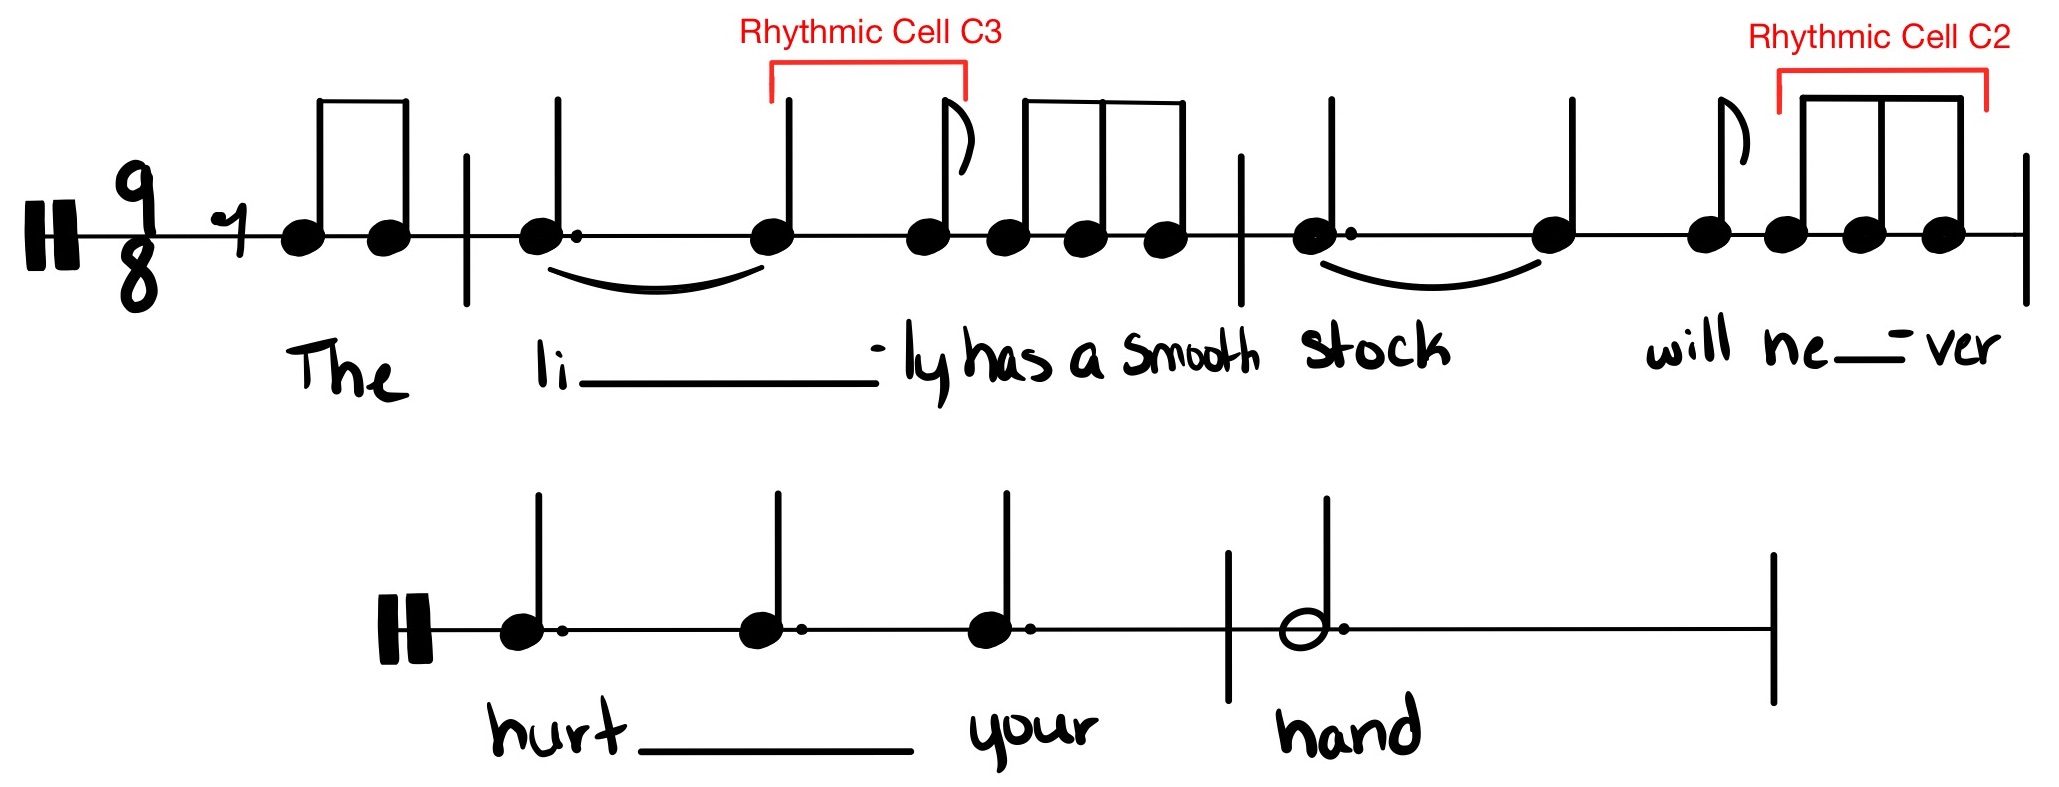
Compound:
Activity: Translate rhythms from protonotation/shorthand into staff notation
Goal: Practice connecting your understanding of music to its written notation.
Before you start: You’ll need to have some completed protonotation/shorthand. You’ll also need staff paper to notate your transcription.
Instructions:
- If you have not already, write the appropriate clef and time signature for the music, leaving space in between for the key signature. (Note: clef, key signature, and time signature go in alphabetical order, and if the melody continues onto additional lines, you only need to repeat clef and key.)
- Go through the rhythms in your protonotation/shorthand, identifying rhythmic cells and/or using your subdivision skills as necessary to map them to appropriate rhythmic note values. Be sure that you are always thinking of the beat in reference to the bottom number of the time signature, which tells us the note value of the beat in simple meter and the note value of the beat division in compound meter. If you intend to add pitches, you may simply do so intuitively as you work or simply write these rhythm values above the staff until you go to the next section on pitches.
Activity: Write down a rhythm in staff notation without using protonotation/shorthand
Goal: Practice connecting your understanding of music to its written notation.
Before you start: You’ll need staff paper to notate your transcription. In addition, if this process is daunting and/or you don’t feel totally fluent with staff notation, we encourage you to rethink your choice to go straight to staff notation and start with protonotation/shorthand. This will help the process feel less overwhelming. With time and practice, it will get easier and more reliable to go directly to staff notation.
Instructions:
- Listen to a song from the playlist below. If you have not already, determine the meter. Write the appropriate clef and time signature, leaving space in between for the key signature. (Note: clef, key signature, and time signature go in alphabetical order, and if the melody continues onto additional lines, you only need to repeat clef and key.)
- Listen through the first 1–2 phrases of the song, doing your best to memorize it. Writing while you listen may interfere with memorization, so we encourage you just to listen and memorize at first.
- Play back the rhythm or full melody in your head while tracking the meter with conducting, tapping, or some other method. Use these motions to determine exactly when each rhythm happens, and use your knowledge of rhythmic cells and subdivision to determine what note values represent what you hear. If you have difficulty, try using protonotation/shorthand first.
- As you work out rhythms and their locations in the measure, write the appropriate rhythmic note values. Be sure that you are always thinking of the beat in reference to the bottom number of the time signature, which tells us the note value of the beat in simple meter and the note value of the beat division in compound meter. If you intend to add pitches, you may simply do so intuitively as you work or simply write these rhythm values above the staff until you go to the next section on pitches.
Image Attributions |
|
