Establishing Visual Anchor Points
Now it’s time to look at the notes!
Inexperienced sight readers often find notated music to be overwhelming. There are a lot of symbols on the page, and they convey a range of information about pitch, duration, volume, articulation, phrasing, and more—often in a single symbol. If that doesn’t overwhelm you, great, you can just skim this section. But if it does, we have some advice for how to start organizing and making sense of the many symbols on the page.
The two parameters that are typically prioritized in sight reading are pitch and rhythm, so we’ll focus there. For each parameter, we can establish visual “anchor points”—some of the most distinctive and noticeable pitch/metric locations—within the notation. From there, we should be able to work out anything else that might occur as well, with reference to these anchors.
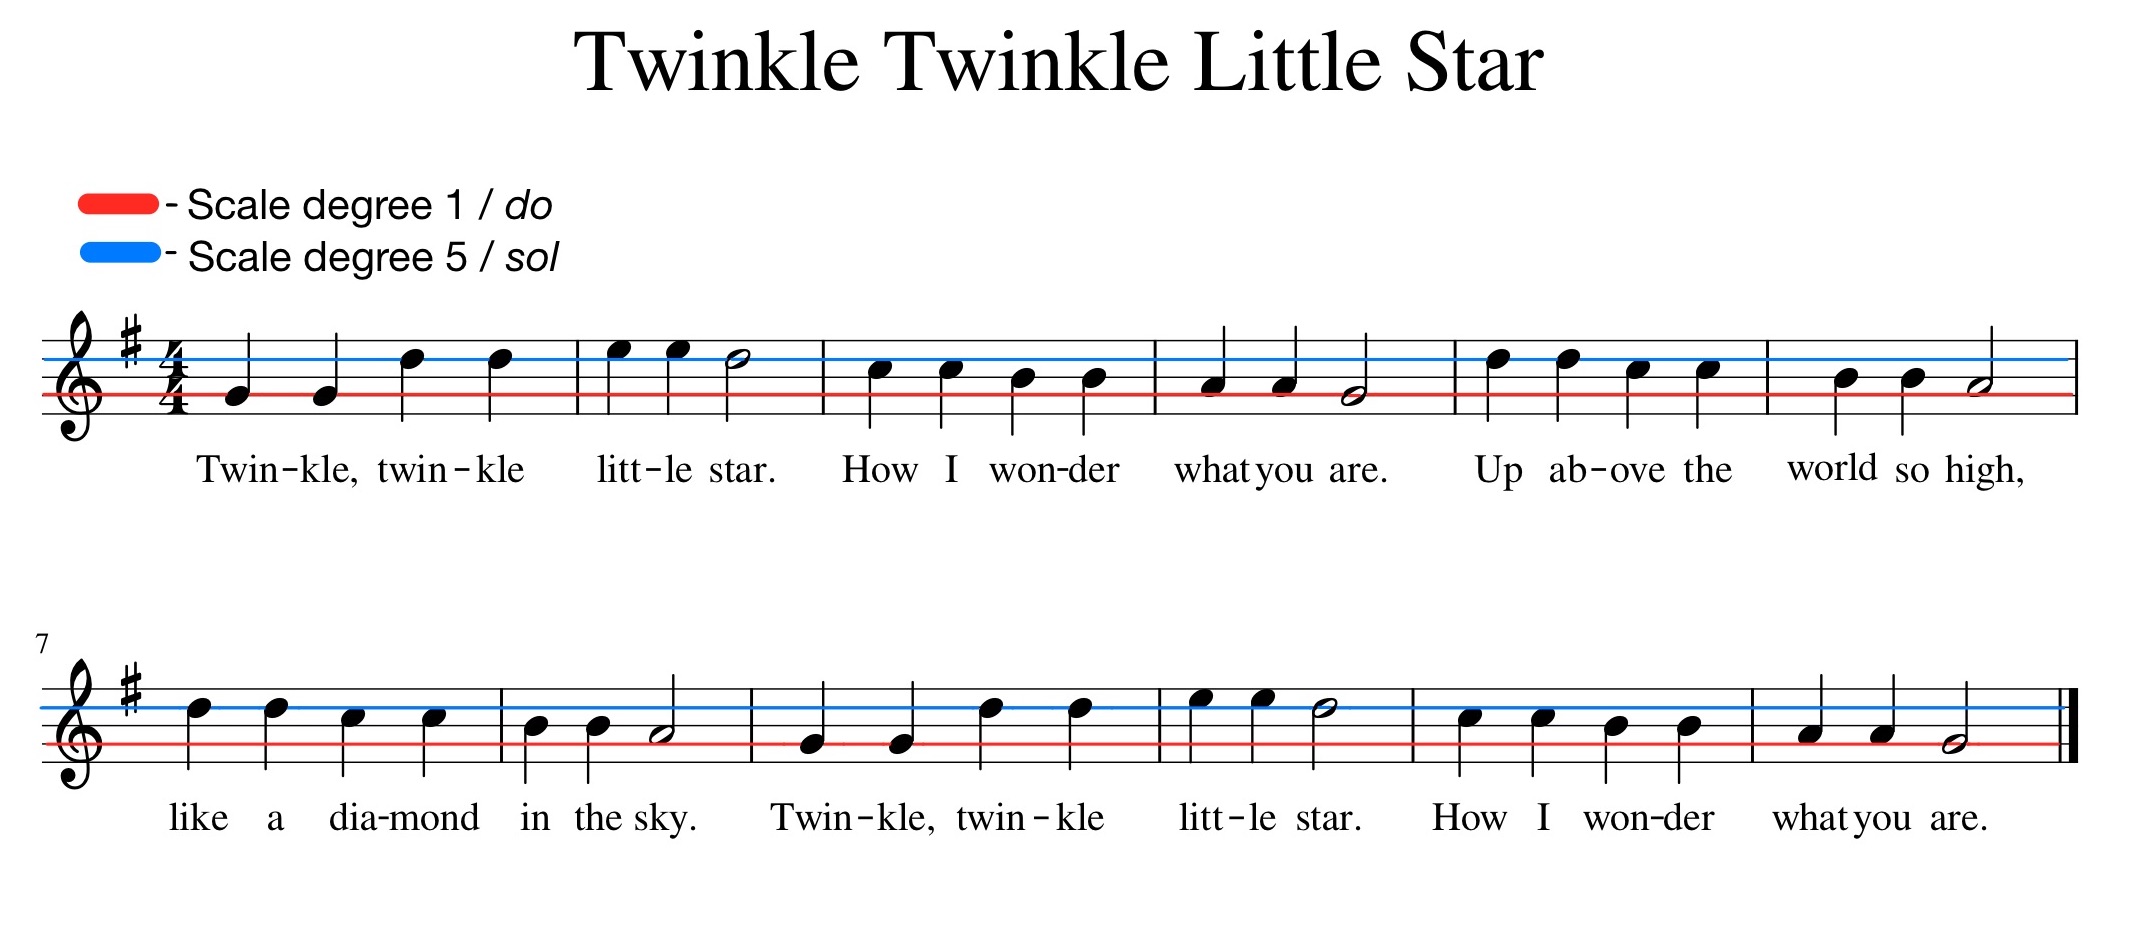
In pitch, the most important locations to establish visually are typically scale degrees 1/do and 5/sol, so we’ll focus there. (Nevertheless, if other anchor points seem more useful based on your experiences and/or the way a particular piece of music seems to work, that’s fine; just adapt the methods we’re about to describe.) Once we’ve established the key, we will visually “call out” these scale degrees on the staff. Keep in mind that these scale degrees repeat at every octave; we’ll visually call out the octaves that seem most important to the melody we’re reading. In the example image below, we highlight these staff locations with colors; you can certainly highlight your scores at first, but over time you will be more flexible if you can simply do this mentally.
In rhythm, we anchor ourselves primarily to the beats. Helpfully, standard notational practice uses beams on anything smaller than a quarter note to show the metric structure, so use these clues to help your eye quickly scan over the music. Even with these, however, at least at first it sometimes helps to draw in some kind of symbol such as a “tick mark” for each beat so that they are easily kept track of.

Activity: Finding anchor points in music you are working on
Goal: Recognize and mark structural tone and beats
Before you start: Find a piece of music. This could be a new piece of music that you are working on privately or in an ensemble, or music from a sight-reading anthology.
Instructions:
- Start by noting the key (remember that songs may modulate away from the key associated with the key signature and that each key signature has at least two possible tonics, one major and one minor) and the meter.
- Using your determined key, identify the tonic (scale degree 1/do) and dominant (scale degree 5/sol) locations on the staff, as appropriate, and call out these locations visually in some way.
- Using the meter, identify how many structural beats are in a measure and what note value typically receives the beat, marking the beats in some way in your music
Image Attributions |
|
