Techniques Used to Study Neurons at the Cellular Level
Jim Hutchins
Objective 2: Describe some of the microscopic techniques used to examine nerve cells.
Light Microscopy
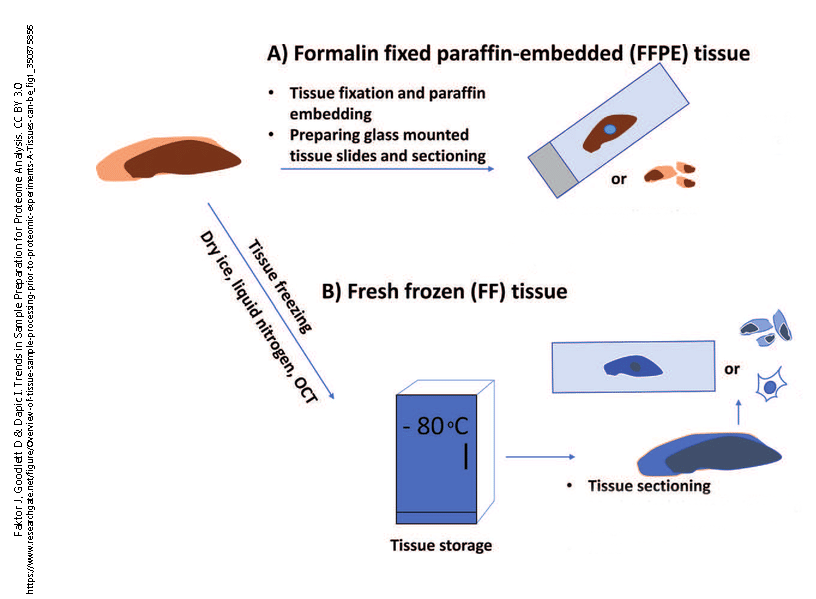
Almost all tissues are too thick to be examined under the microscope. Light cannot penetrate more than a few thousands of a millimeter into most tissues. For this reason, light microscopy depends on the thin sectioning (slicing) of tissues. However, tissue is also too soft to slice very thin without some sort of modification. Two methods of thin slicing became popular among scientists studying tissues (histologists).
The first of these was fixation in formaldehyde followed by removal of water and its replacement with organic solvents and then paraffin (the wax used in candles). Fixation is a necessary step for preserving tissues. It kills bacteria and fungi, and chemically modifies the proteins in a tissue so that they are not dissolved by the organic solvents. Paraffin wax is not soluble in water, so the water must be removed by a series of increasing concentrations of alcohol, then replacement of the alcohol with xylene or another organic solvent that can be mixed with paraffin so that the paraffin molecules can penetrate into the tissue. Once this embedding step is completed, the tissue can be sliced very thin (typically, about 1/250 of a millimeter, or 3-5 μm) using an instrument called a microtome (Latin, “small cutter“).
However, it quickly became apparent that by solving one technical problem, histologists created another. Now light could penetrate the tissue, but in general, the constituents of cells were clear and so there was nothing to see. One solution is to alter the properties of light to visualize tissues, but that had yet to be developed. The other is to stain the tissue with dyes which revealed specific cell components.
In the 19th century, chemists began to study the properties of coal tar, a toxic sludge which was being produced in large quantities as a waste product of burning coal. We now know it’s a complex mixture of carbon ring structures. When chemists reacted coal tar with nitrogen, colorful dyes (aniline dyes) were produced which were immediately popular as fabric dyes in the fashion industry. These dyes were also popular with German histologists of the late 19th century. These dyes are still in use today to stain tissues that the pathologist will examine under the light microscope. The limit of resolution (smallest thing one can see) of the light microscope is an unchangeable property of the wavelength of light. The limit of resolution of light microscopy is about 1 μm, but as most cell bodies are about 10 times larger than that, histologists could at least see the nuclei and some of the larger parts of cells.
Neurons were still a problem, because the dendrites and especially the axon were often too small to see — for example, the axons carrying pain and temperature information are about 0.1 μm in diameter.
The Nissl Stain
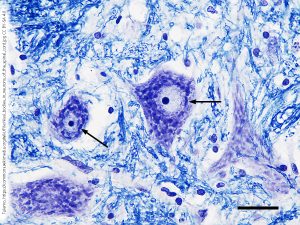 Franz Nissl used one of these aniline dyes, cresyl violet, to stain neurons. The chemical constituents of cells were not known at this time. But now we know that the nucleus is filled with deoxyribonucleic acid (DNA) and ribonucleic acid (RNA), and that the protein synthesis machinery is heavily dependent on RNA. As the name tells us, these are acids: they carry a large number of negatively-charged phosphate (–PO43–) groups in their phosphate-sugar “backbones”.
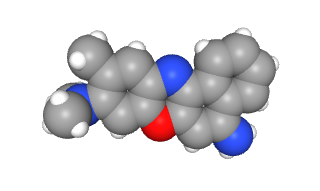
Cresyl violet has three rings of six carbons each (gray circular structures in this space-filling model) and three amino (–NH3+) groups (bright blue atoms). It’s also a rich purple color, as you can see in the Nissl stained section at left. The positive charges of the dye are attracted to the negative charges in DNA and RNA. Neurons are constantly and dynamically synthesizing protein as part of their normal activities. For this reason, the neuronal cell body is filled with ribosomes and other nucleic acid-containing structures, what we now call Nissl bodies or Nissl substance in honor of Franz Nissl. The staining techniques he pioneered using cresyl violet are still called the Nissl stain. The Nissl stain is the foundational technique of the modern neurohistology lab.
Modern methods of light microscopy have become quite elaborate and can produce exquisite data, such as the localization of a specific molecule in a single cell. This allows the scientist to correlate the morphology of a cell, as seen through the light microscope, with its chemical properties. This video demonstrates how this is achieved with a technique called desorption electrospray ionization (DESI) mass spectrometry
The Golgi Stain
Many of the interesting parts of a neuron are still invisible in Nissl-stained tissue sections. For example, an axon terminal is perhaps 0.1 μm wide at its largest point and the gap between neurons at the synapse is an incredible 0.020-0.040 μm (20-40 nm) wide. Histologists were still mystified at how information could be transmitted between neurons.
Physiologists and anatomists quickly grouped into two warring camps, which became known as the Reticular Theory and the Neuron Theory (or Neuron Doctrine).
The Reticular Theory camp believed that neurons formed a continuous network (Latin reticulum, “network”). An Italian anatomist, Camillo Golgi, was a major proponent of this theory and he used a special stain to defend his position.
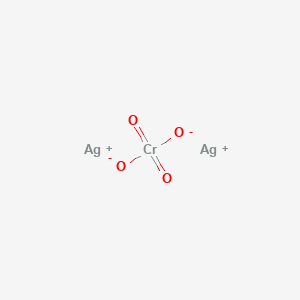
The Golgi stain only labels perhaps 1/1000 of the neurons in a tissue slice, but those that are labeled are completely filled with a dense black chemical called silver chromate (Ag2CrO4). Because both silver and chromium atoms have big nuclei, they easily stop photons and when light is shot through the tissue, the absence of photons appears black.
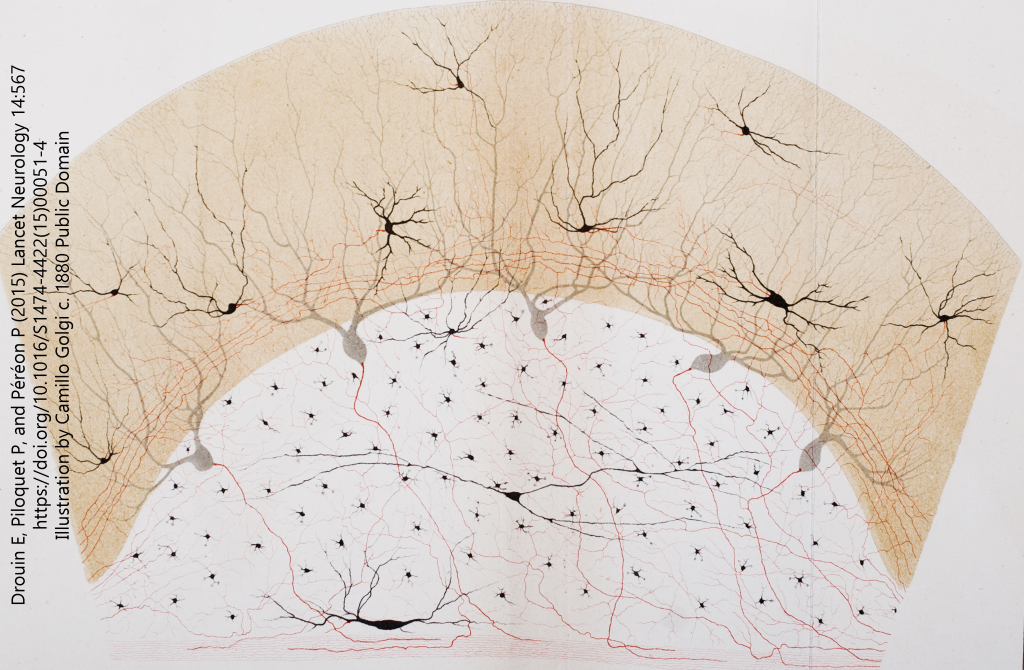
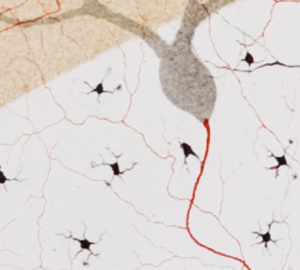 Golgi and other proponents of the Reticular Theory could not see how electricity could be transmitted between nerve cells without a cytoplasmic bridge. Therefore, Golgi created one and drew neurons that had such a bridge. Just to make sure you can see them, he colored these connections in red. (He was a colorful character in more ways than one, as we will see.)
Meanwhile, in Spain, Santiago Ramón y Cajal was using the Golgi stain to come to a completely different conclusion. He and the British physiologist Charles Sherrington led the Neuron Doctrine camp. Their theory was supported on both physiological grounds (as stated by Sherrington) and anatomical grounds (as drawn by Cajal).
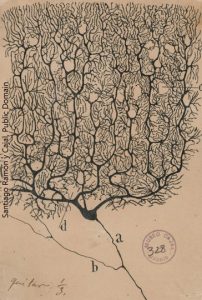
The Neuron Doctrine had become the prevailing theory by the time Golgi and Cajal received a joint Nobel Prize in Physiology or Medicine in 1906. Golgi and Cajal didn’t like each other much. In fact, Golgi used the occasion to rip Cajal a new one. (It must have been galling for him to have his staining technique used to argue that he was wrong.) Of course, as you can see from the quote at right, Cajal got his licks in as well. This is typical of the tense interactions between the two great scientists.
Ironically, the thoroughly discredited and widely disliked Golgi turned out to have been partly right. We will later see a type of contact between nerve cells which is called the electrical synapse (gap junction), which indeed joins neurons in a syncytium or cellular network. These are uncommon in the mammalian brain but still present and functionally important in the formation of neural networks.
By the turn of the 20th century, Cajal and Golgi had taken light microscopy as far as it could go. For example, in 1909, the German anatomist Korbinian Brodmann did as much as one can do with the Nissl stain, applying it to frozen sections in order to study the arrangement of nerve cells, or cytoarchitecture. It would remain for World War II to train biologists in physics, so that they could contribute to the Allied war effort. This in turn led to an explosion in our understanding of the nervous system with, for example, innovations in electron microscopy and neurophysiology.
Electron Microscopy
The 1 μm resolution limit had become an impediment to science’s understanding of how the nervous system works. There was a critical need for a technique that would allow the visualization of structure down to the molecular level, what is now called ultrastructure.
For those who crave more detail, with some math and physics, the University of Utah has an excellent tutorial on electron microscopy.
While the wavelength of visible light is in the range of 0.1 μm, the wavelength of an electron is closer to 1 pm (i.e. 100,000 times smaller). That means that the theoretical resolution of the electron microscope is close to infinitely small. In practice, it’s about 0.1 nm. That makes it ideal for examining tissue at the molecular level.
But the human eye is unable to detect electrons, and so a number of intermediary instruments are needed in order to visualize biological tissues with electrons.
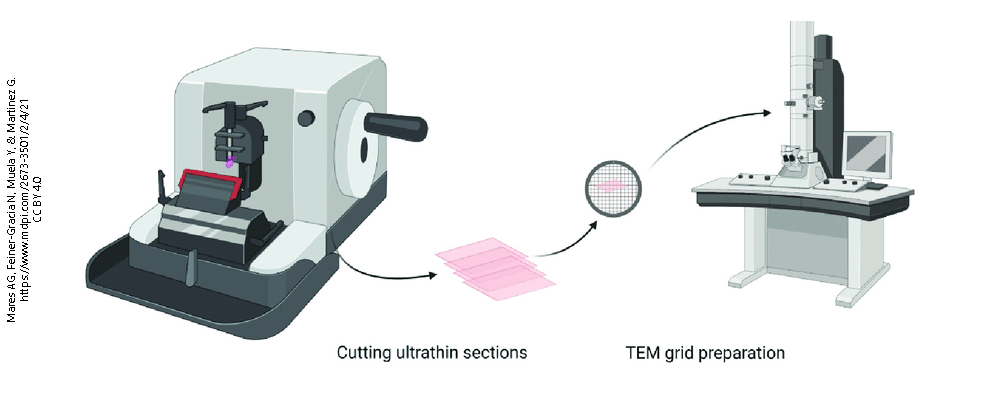
First, the tissue must be incredibly hard and sections must be cut almost unimaginably thin (about 100 nm). In order to achieve this, the tissue must be made hard by embedding it in epoxy resin, like the adhesives found in the hardware store. The epoxy-embedded tissue block is cut on an ultramicrotome with a diamond knife, because metal knives literally do not cut it.
The resulting section is so thin and delicate that it must be supported by a copper grid.
Conventional light microscopic dyes do not work in electron microscopy. The most common dye used is also a fixative: osmium tetroxide (OsO4). Osmium nuclei are big (atomic number 76, vs lead at 82), and so they are good at deflecting electrons. Osmium tetroxide, however, is highly toxic and procedures using osmium must be carried out in a special laboratory fume hood. (Osmium is named after the Greek word osmē, “smell”, because of its characteristic stinkiness. But once the scientist smells it, those olfactory neurons are dead and gone.)
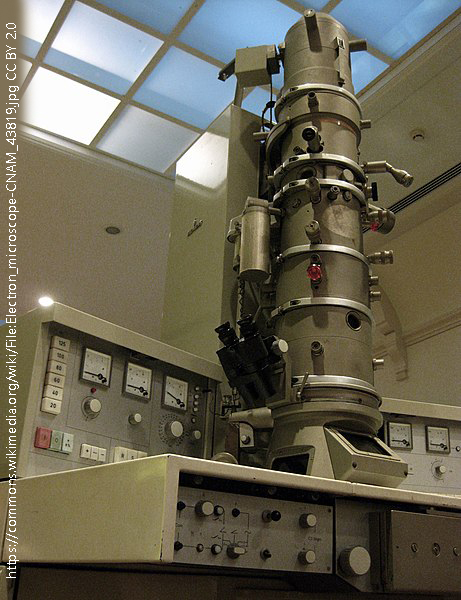 Now we have an osmium-stained, epoxy-embedded ultrathin tissue section supported by a copper grid. But electrons don’t travel far in air; they are light and ricochet off air molecules. We have to put this whole setup in a vacuum. At the top of the vacuum chamber, we put a gun that shoots electrons instead of bullets. At the bottom, near the operator’s seat, we put a phosphor screen that glows when it’s hit by electrons. In practice, the glowing is difficult to see because there is a piece of thick lead-impregnated glass between the phosphor screen and the operator to keep the operator from being bombarded by stray electrons and which has to be thick so that it doesn’t break as it separates atmospheric pressure from a vacuum. With experience, the operator can get good at finding interesting-looking places to investigate, but ultimately, they don’t know what they have got until they develop the electron-sensitive photographic film that can be placed underneath the sample grid.
The electron microscope shown here is actually a museum exhibit at the French Conservatoire National des Art et Métiers. That is a good clue that it’s not being used much anymore. I should know; my masters thesis (1982) and doctoral dissertation (1985) relied heavily on electron microscopy, but biological scientists reached the limit of what they could see with an electron microscope and its use fell out of favor in the 21st century.
Immunohistochemistry (Immunocytochemistry)
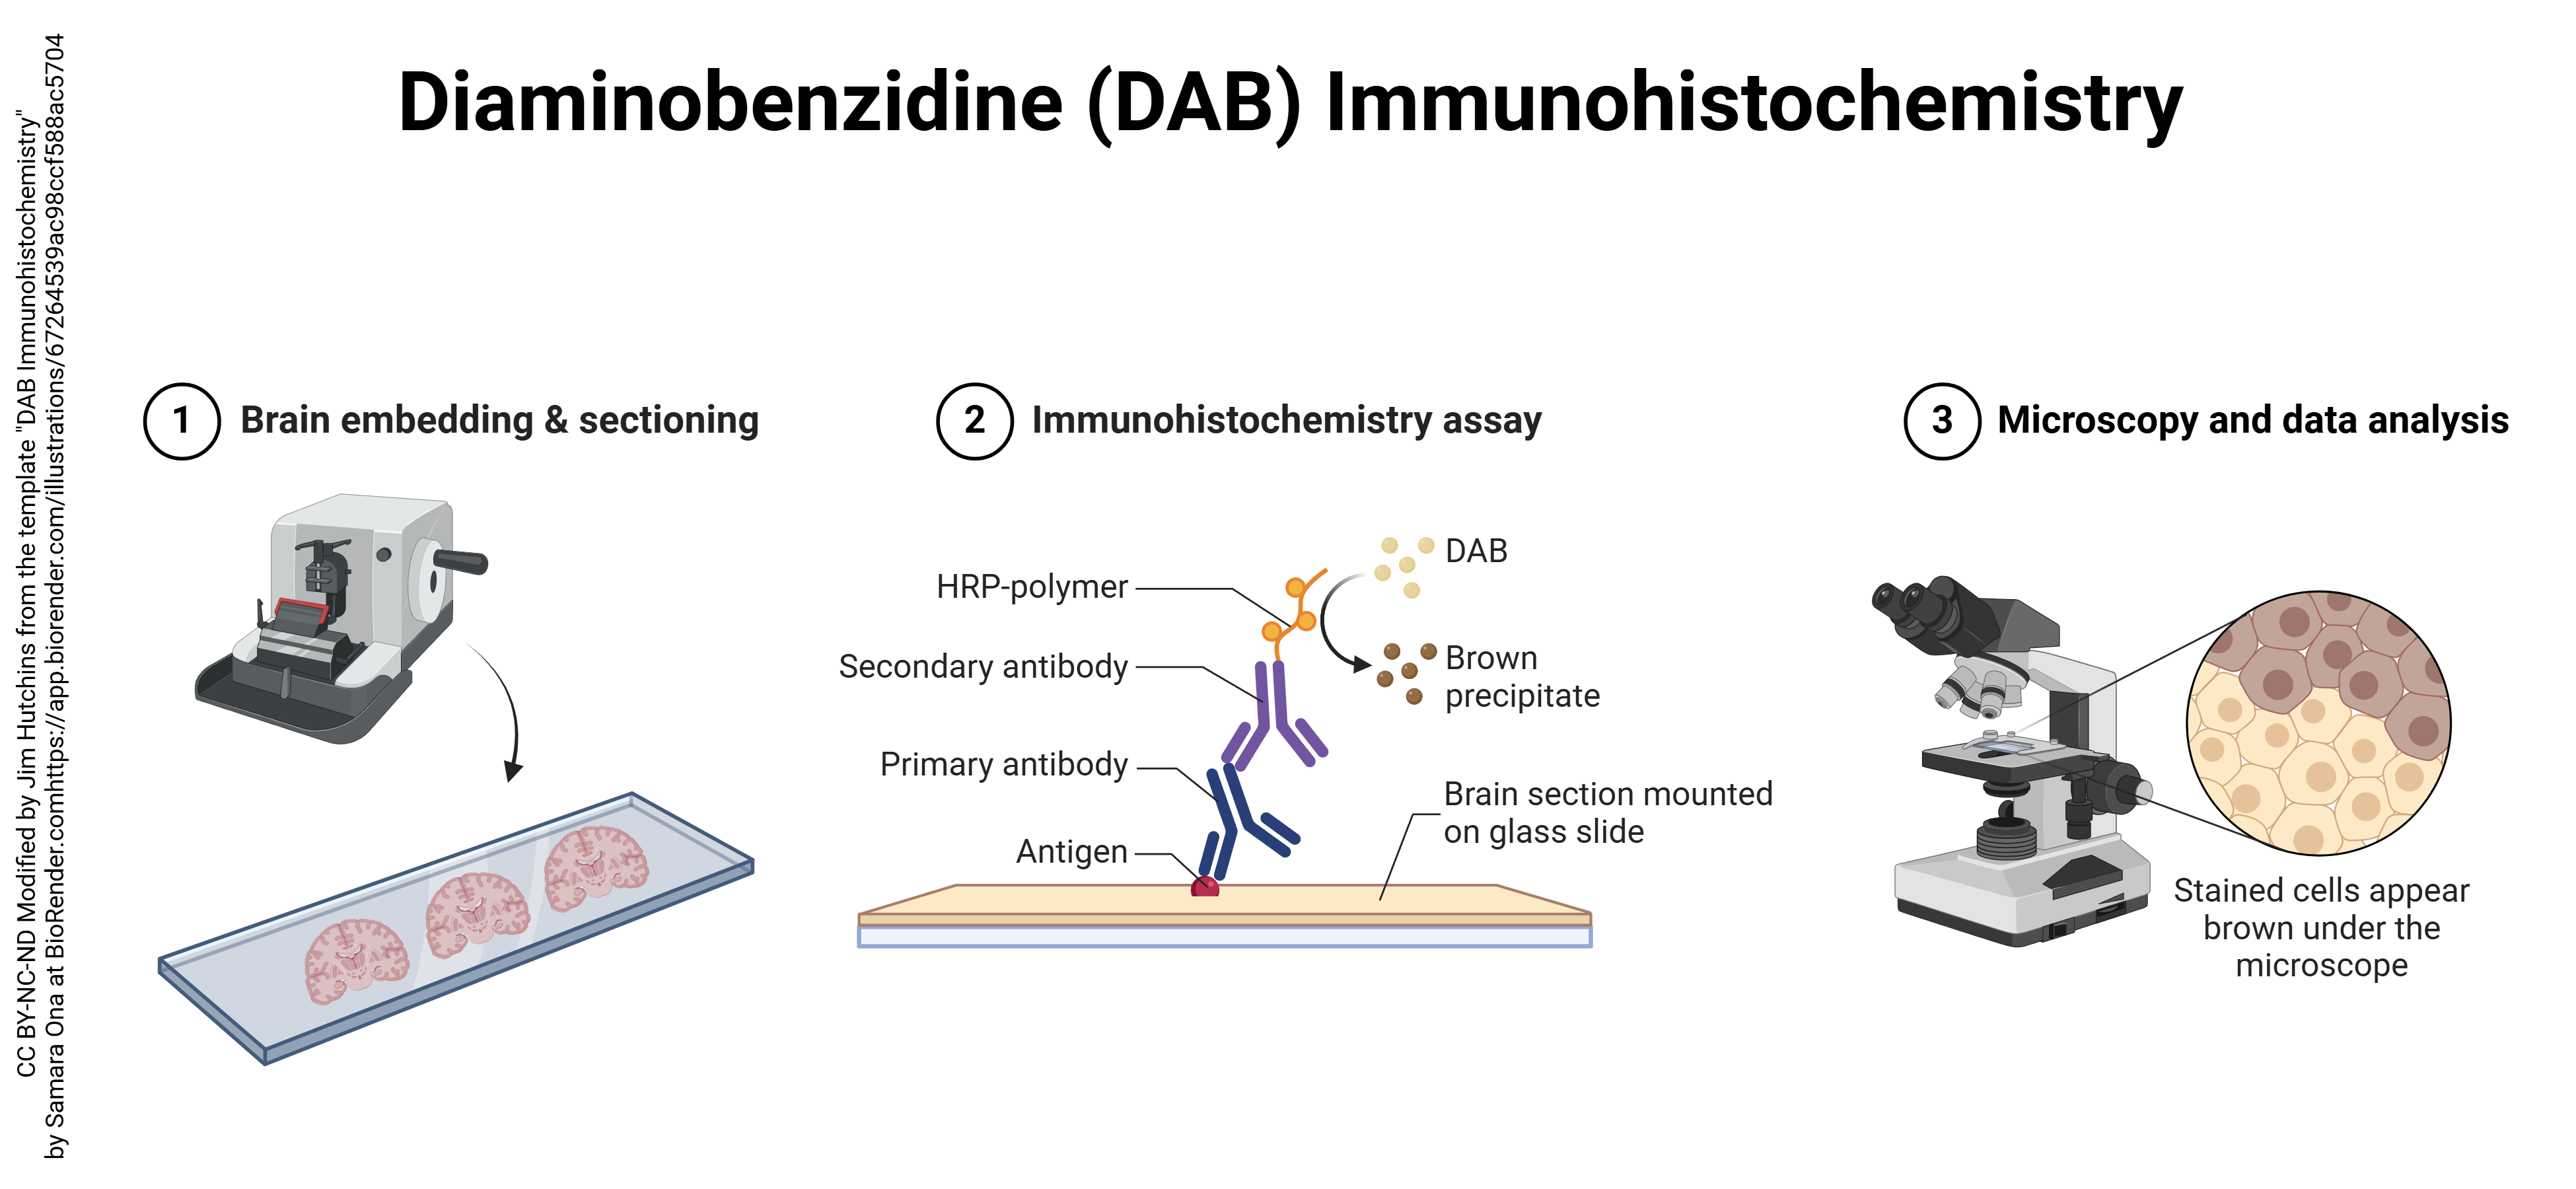
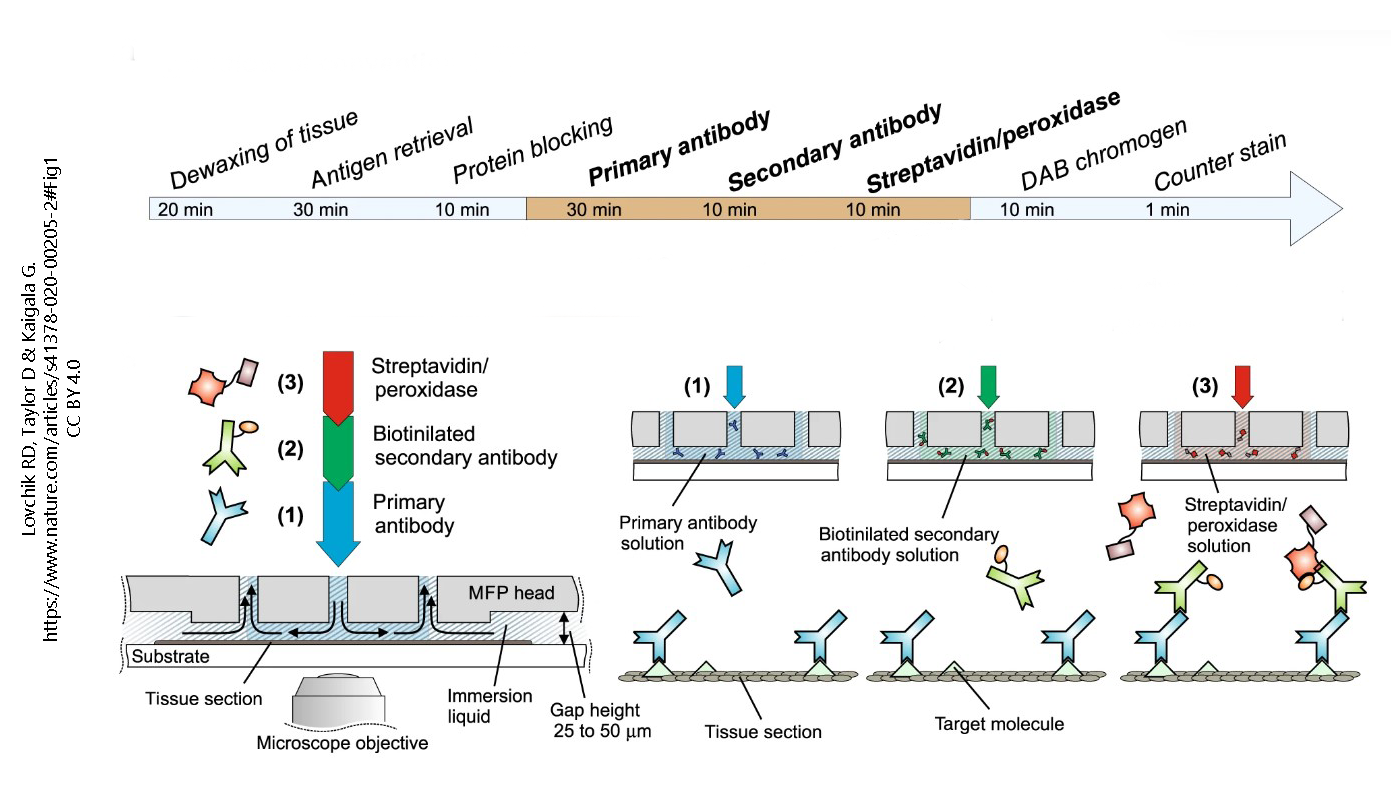
In the last quarter of the 20th century, a new light microscopic technique called immunohistochemistry (“immune molecules used to visualize tissue chemistry”) or immunocytochemistry (“immune molecules used to visualize cell chemistry”) began to expand the utility of both light and electron microscopy. Immunohistochemistry depends on the strong binding of antibodies to specific molecules. Antibodies can be made inside animals (typically, a mouse or a rabbit) by injecting a chemical into the animal and then isolating the defensive molecules that are made to protect the animal from the foreign substance injected. Antibodies are Y-shaped molecules with a binding site at the tip of each arm of the Y (shown here by a triangular divot out of the molecule).
Antibody production can be hampered by fixation of tissues. Also, larger molecules (such as receptor proteins) are easier to detect with antibodies than smaller molecules (like the neurotransmitters that bind the receptor). Beyond those limitations, the technique is quite versatile. Generally, the binding of primary antibody is not detectable without amplification. The usual amplification uses two additional layers of antibodies, with the antibodies of the third layer labeled with a fluorescent signal or enzyme which can be detected by the investigator. For example, here a blue primary (1°) antibody, which detects the target molecule (green triangle), is bound by dozens of green secondary (2°) antibody molecules. The 2° antibody is tagged with biotin, a B vitamin. That seems strange until one realizes that biotin is strongly bound by a bacterial protein called streptavidin. The third layer is streptavidin bound to horseradish peroxidase, which can turn colorless diaminobenzidine (DAB) into an oxidized, dark brown stain.
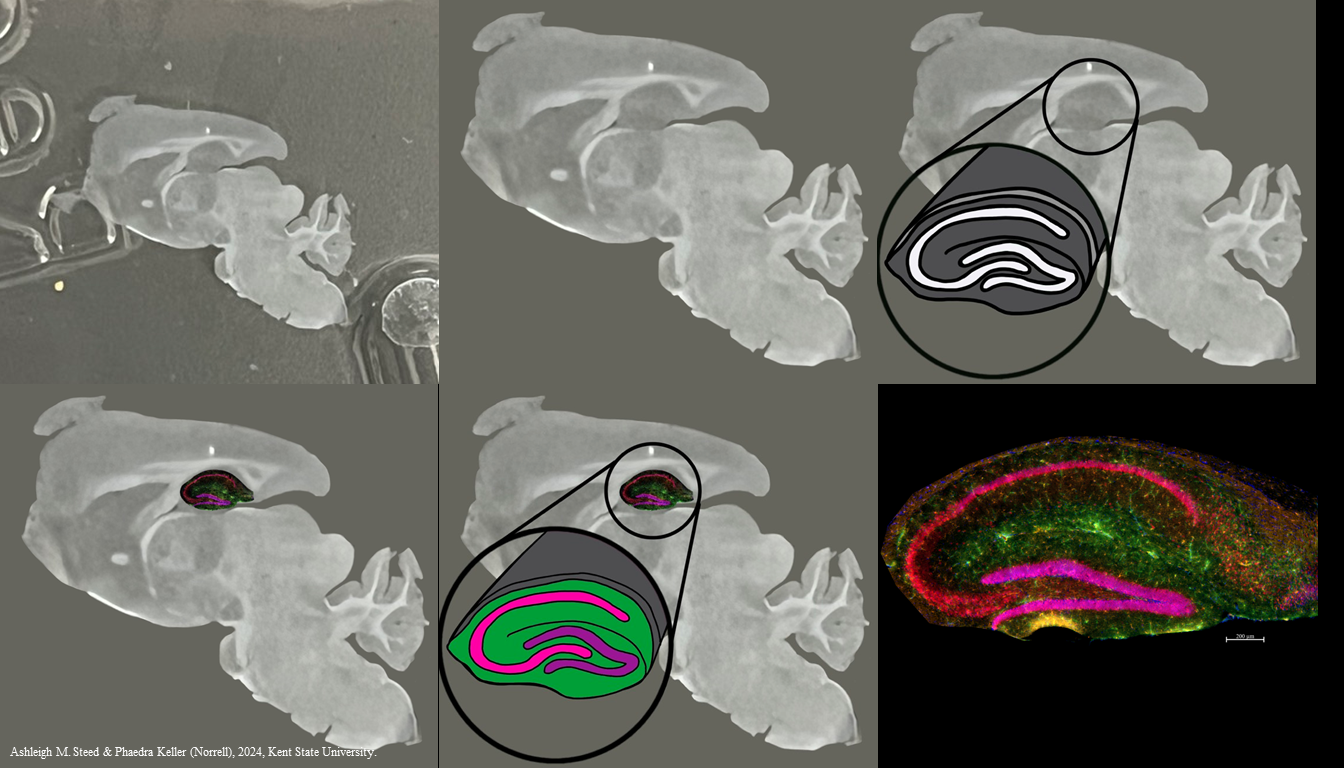
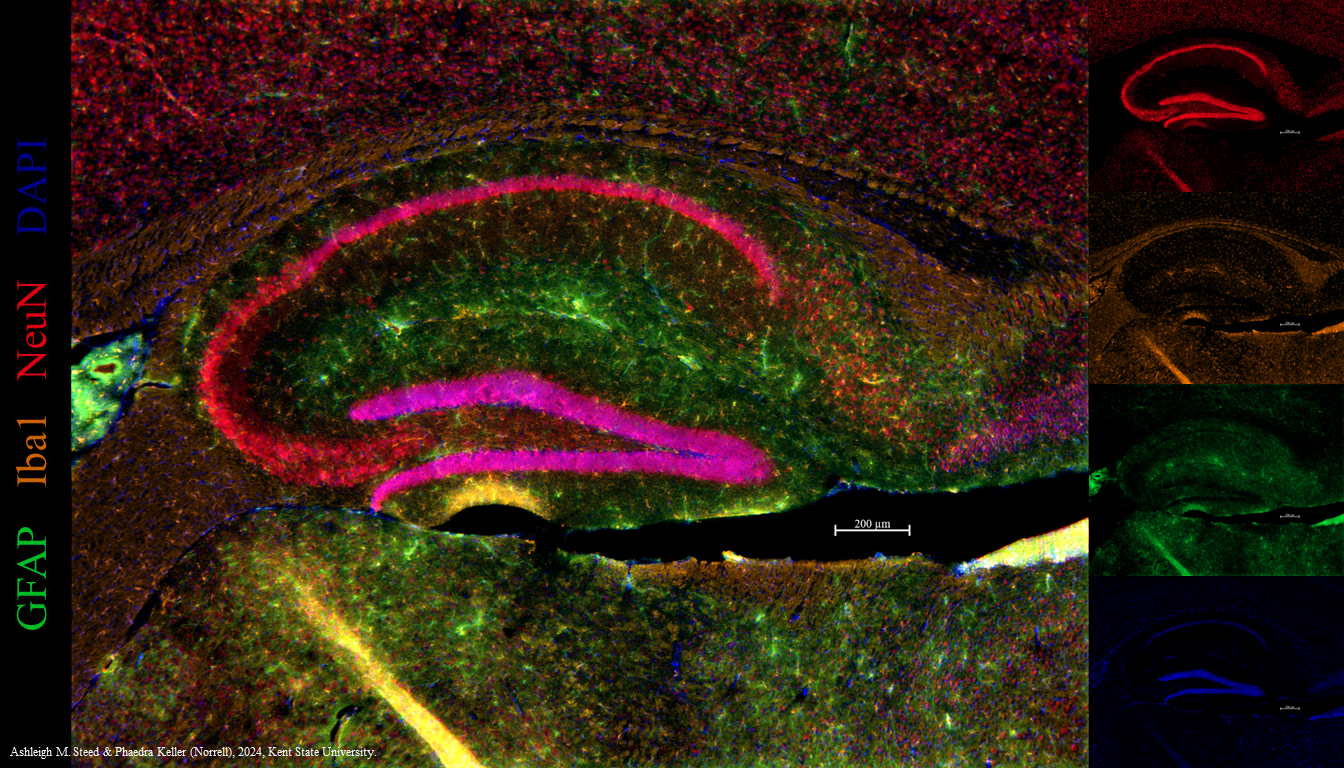
That limits the investigator to one color — brown — when it’s useful to detect multiple molecules in the same tissue section. For example, we may want to detect glial fibrillary acidic protein (GFAP) in astrocytes; ionized calcium-binding adapter molecule 1 (Iba1) in microglia; and neuronal nuclear protein (NeuN), all in one tissue section. We can tag each of these with different colors of fluorescent label (green, orange, and red, respectively) and localize all three at once in a section of a mouse hippocampus.
Media Attributions
- Preparation for lm © Jakub Faktor, David R Goodlett, and Irena Dupic is licensed under a CC BY (Attribution) license
- Nissl substance © Tulemo is licensed under a CC BY-SA (Attribution ShareAlike) license
- Cresyl violet © PubChem is licensed under a Public Domain license
- Silver chromate © PubChem is licensed under a Public Domain license
- Illustration of neurons © Camillo Golgi (from the Opera Omnia) is licensed under a Public Domain license
- Neurons as Cells © Camillo Golgi (from the Opera Omnia) is licensed under a Public Domain license
- Purkinje cell © Santiago Ramón y Cajal is licensed under a Public Domain license
- Preparation for em © Glinkowska Mares, Adrianna, Natalia Feiner-Gracia, Yolanda Muela, Gema Martínez, Lidia Delgado, Lorenzo Albertazzi, and Silvia Pujals adapted by Jim Hutchins is licensed under a CC BY (Attribution) license
- Electron microscope © Antoaneta is licensed under a CC BY (Attribution) license
- DAB immunohistochemistry to localize antigen in brain sections © Samara Ona adapted by Jim Hutchins is licensed under a CC BY-NC-ND (Attribution NonCommercial NoDerivatives) license
- Preparation for IHC © Robert D Lovchik, David Taylor, and Govind Kaigala is licensed under a CC BY (Attribution) license
- Tissues used for immunohistochemistry © Ashleigh Steed & Phaedra Keller (Norrell) is licensed under a All Rights Reserved license
- Neurons as Cells © Ashleigh Steed & Phaedra Keller (Norrell) is licensed under a All Rights Reserved license

