102 StoryMaps
ArcGIS StoryMaps
ArcGIS StoryMaps is one of the interactive tools we have for sharing instructional content. Students can scroll through text and images, watch videos, and even complete interactive H5P activities within a StoryMap. Created StoryMaps are hosted on ArcGIS. We link to them within Canvas courses using a link or an embed code.
We have a StoryMap Guide for IDs and some templates you can use for your faculty when they create content. They are located in the IDS Course Development folder “StoryMaps Resources.”
UVU has an institutional StoryMaps account where you can log in with your UVU credentials.
Quick Links
- UVUStoryMaps (This is where you go to sign in)
- StoryMap Guide-ID (Explains how to sign in, create, and edit StoryMaps)
- StoryMap Basic Template (Share this with faculty when they are ready to create content)
- StoryMap Advanced Template (Share this with faculty who are already familiar with StoryMaps when they are ready to create content)
- This is a StoryMap (Sample for use when explaining a StoryMap to faculty)
- Getting started with ArcGIS StoryMaps (ArcGIS-created information)
- Storymaps Training 9/2/2022 (Professional development training we did as a group)
Copying Storymaps to Another Account
Use ArcGIS Assistant (esri-ps.com) to copy Storymaps from one account to another:
- Sign in to the account that has the Storymaps.
- Add your UVU/OTL account.
- Choose the items you want to copy.
- Choose the folder where the items will be copied.
- From the folder, add the items to the OTL group so that others can access them.
Changing Ownership
Sometimes we need to be able to change the owner of a StoryMap created by someone else so we can edit or update it. If you are an ID 2 or ID 3, you will be able to do so by following these steps:
- Login to UVUStoryMaps.
- Select “Content” from the navigation bar across the top.

- Select “My organization” from the Content navigation bar.

- Find the StoryMap you want and click on the title. This will pull up a settings screen for the StoryMap.
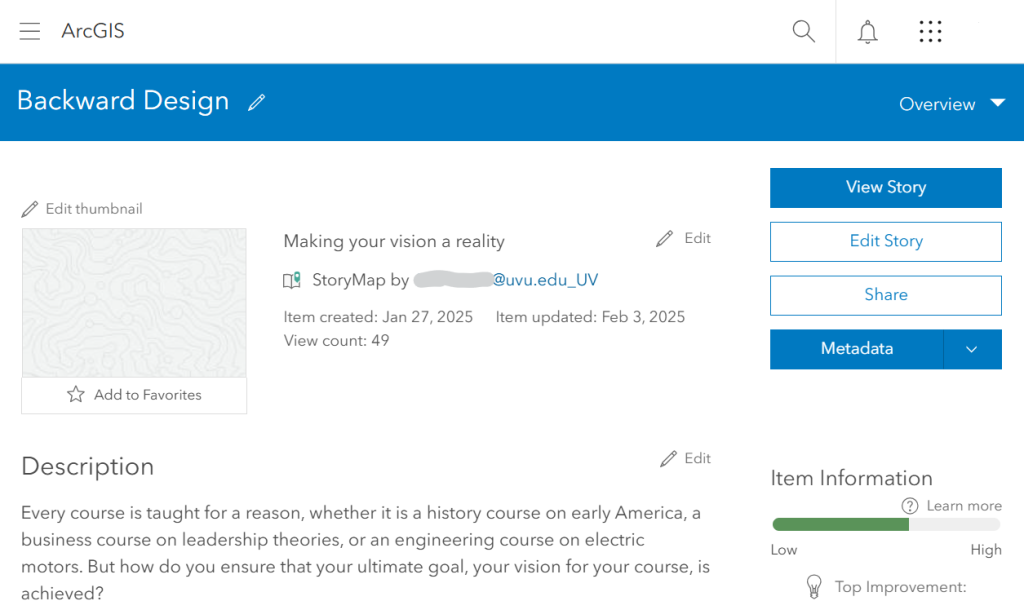
- Scroll down to the Owner information on the right side of the screen.
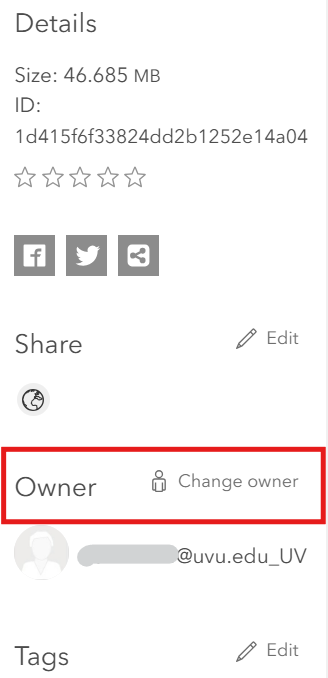
- Select “Change owner.”
- Find the user to whom you want to transfer ownership.
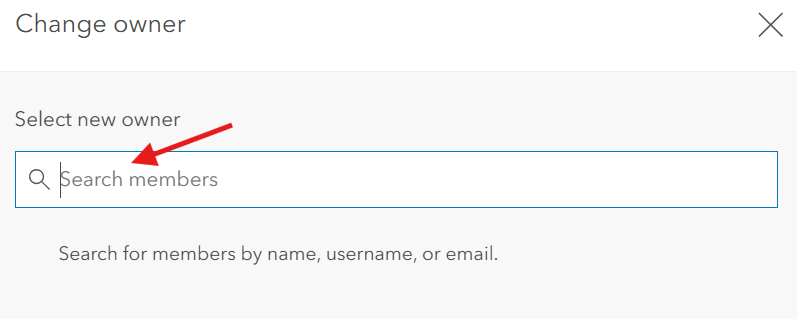
- Save the change.

Editing Someone Else’s StoryMap
If you are an ID 2 or ID 3, you can edit any StoryMap created at UVU.
If you are an ID1 and need to edit a StoryMap, ask an ID 2 or ID 3 to switch ownership to your name.
To edit a StoryMap:
- Login to UVUStoryMaps.
- Select “Content” from the navigation bar across the top.
- Select “My organization” from the Content navigation bar.
- Find the StoryMap you want and click on the title. This will pull up a settings screen for the StoryMap.
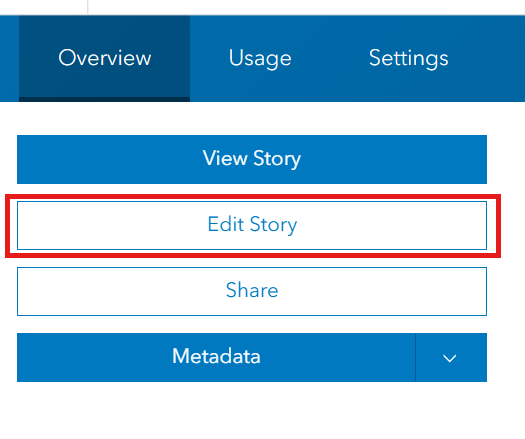
- Select “Edit Story.”
- Once you finish editing, select the Publish button to save the changes.
