92 H5P
We presently have two versions of H5P: Standalone and Pressbooks.
- The standalone version of H5P can be accessed here. You will need an account that will be set up by Seth Gurell (IDA Director). You will then choose a password and you should be able to access the site.
- The Pressbooks version of H5P needs to be enabled. Instructions will be found later on this page.
H5P Stand Alone Version
The standalone version of H5P is integrated with Canvas. You will be able to create Canvas assignments and using the the External Tool LTI, link an activity that you have created. Students will be able to complete the activity and receive a score.
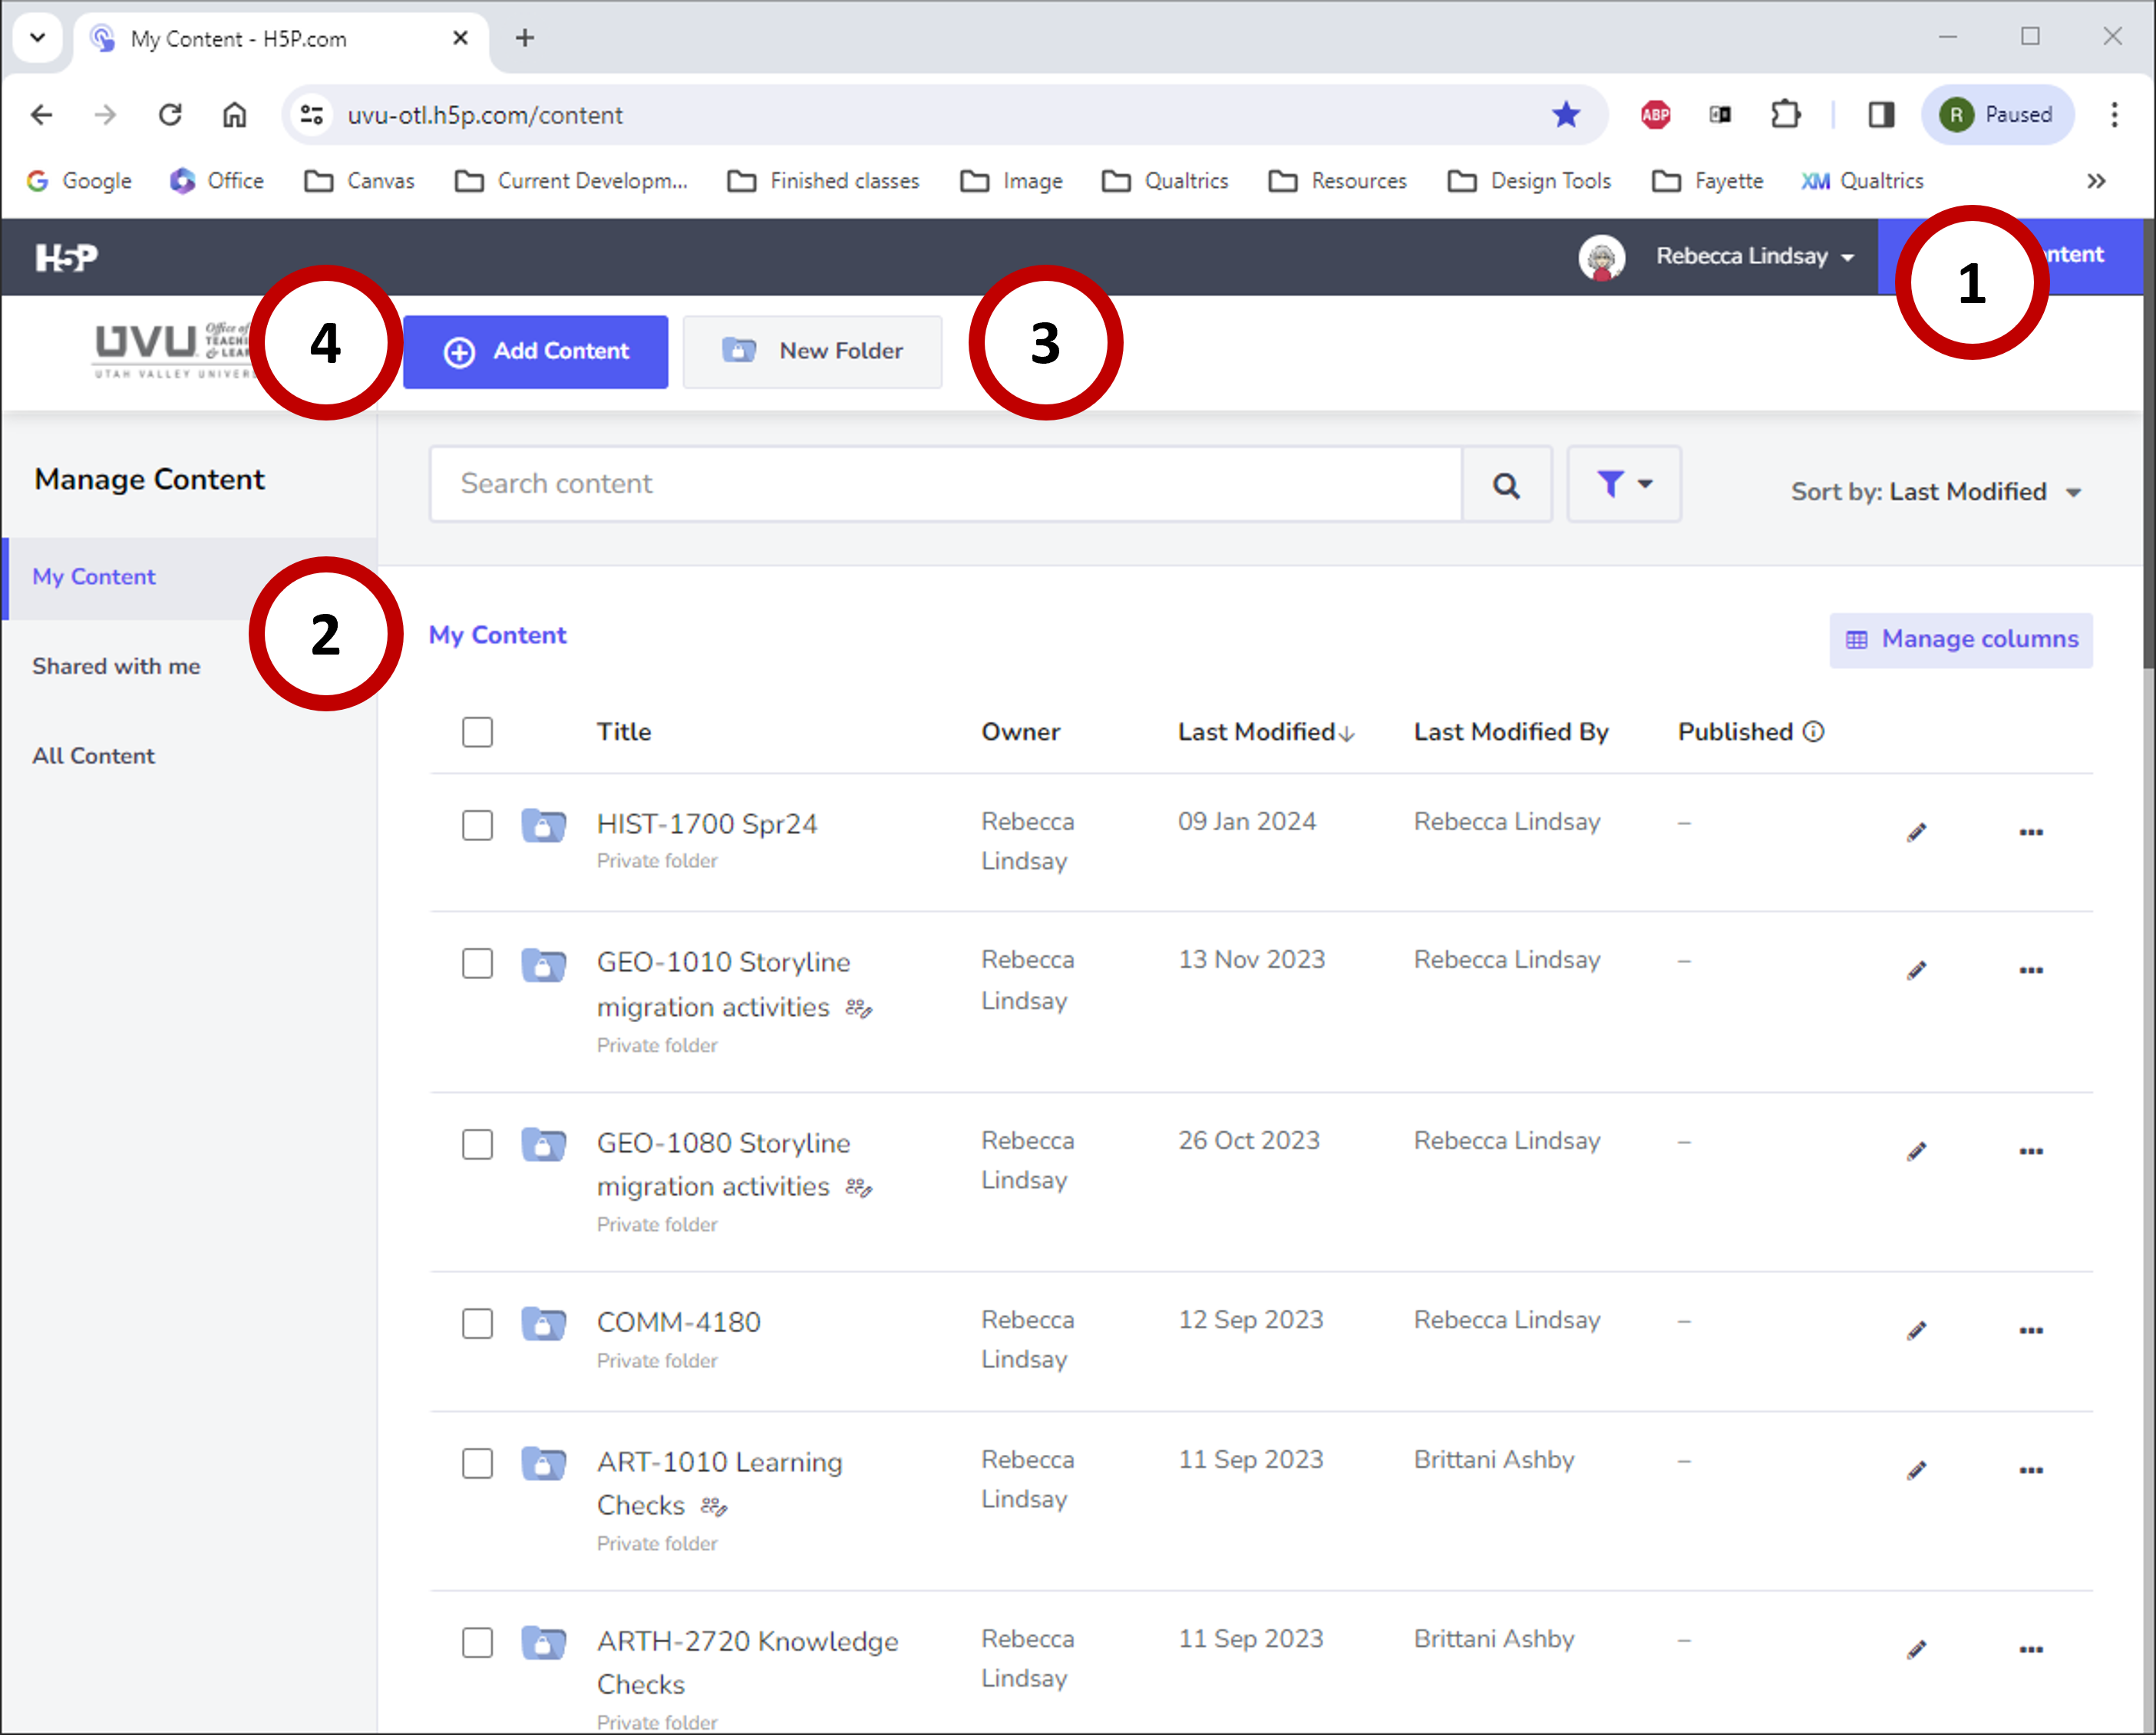
Above is a screenshot of the standalone interface.
- You will see your name with a drop down menu.
- In the dropdown menu you will find a Getting Started link. This link will take you to a site that with examples and guides for the H5P activities that you can build.
- You see options for “My Content,” “Shared with me,” and “All Content.”
- These options will allow you to filter the content. Activities on which you are a collaborator, and activities that have been shared with the institution can be found in the “Shared with me” option. To see everything that you have access to, click on “All Content.” You can look at any activity in the file folders, but remember, most of the activities are “live” and are being used in courses. If you would like to explore an activity, you can clone it by clicking on the three dots on the right of an activity, and choose “Clone” from the dropdown list.
- You can create new folders for your activities.
- It is suggested that you create a new folder for each course that you are working on, so that the activities can be easily found.
- To create a new activity, click on the “Add Content” button.
- Most of the activities in the list are accessible, but check the accessibility chart for details.
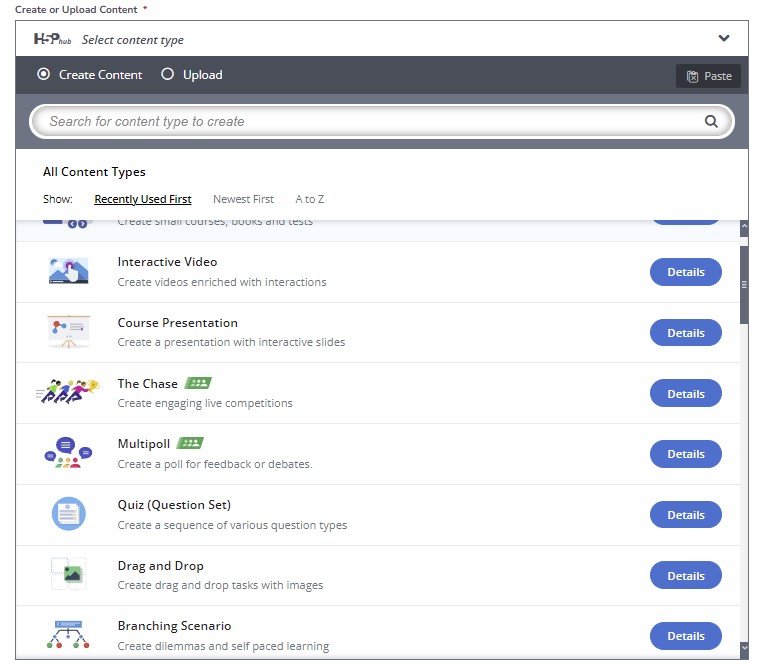
To create a new activity, choose your activity from the dropdown list. If you would like to know more about an activity, click on the Details button. You will see some screenshots and can find out more about the activity. Select “Use” from the Details screen or click on the title of the activity in the dropdown list to choose an activity.
At the bottom of the activity, is a tabbed list of options.
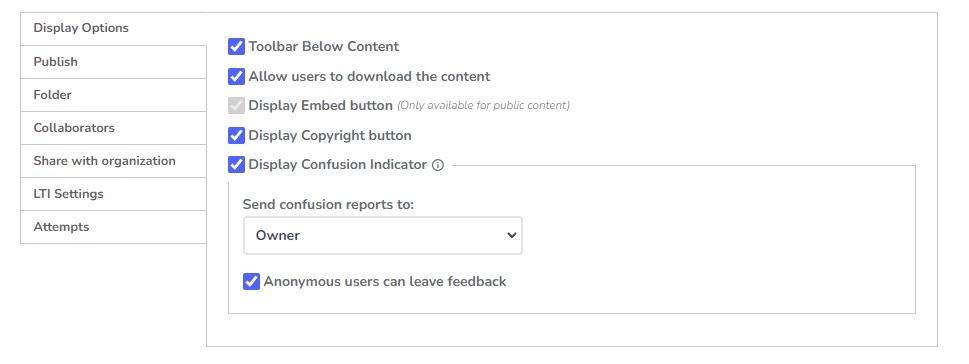
The Tabbed list has the following options:
- Display options: This gives you a list of options that will show at the bottom of a published activity
- Publish: This gives you the status options for the activity. The default is the “Protected” status. This allows for the activity to be inserted into Canvas. The “Public” status allows for the activity to be embedded in pages outside of Canvas. The default status will work for our purposes.
- Folder: This tells you where the activity will be saves
- Collaborators: This allows you to add or remove a Collaborator, and to see all of the Collaborators that have access to this activity.
- Share with organization: This tells you if the activity is shared to the organization
- LTI settings: This lists some options for how the activity will interact with the LTI. You can specify the size of the activity, and choose when to send the scores to Canvas. From the dropdown menu choose from “Do not send score,” “First attempt,” “Last attempt,” and “Best attempt.” Make sure to choose the setting that will fit best with the objectives of the activity.
- Attempts: This allows you to choose how many times a student can submit an answer.
Add to a Canvas Assignment w/Grade Passback
To add an activity to a Canvas assignment with grade passback do this:
Add to a Canvas Assignment w/o Grade Passback
If you need to add an activity to Canvas without a grade passback, do this:
OER H5P Activities
You can find a number of OER H5P activities, that you could use on the web:
You can find OER activities in the Pressbook directory. Another repository that has a number of activities is the eCampusOntario H5P Studio.
Using a Kaltura Video in the interactivity
To use a video in an interactive activity you must have an mp4 of the video. Because we need the video to be captioned, the easiest way to do that is to upload it to Kaltura.
- Go to Kaltura and download a copy of the video (unless you already have a copy)
- Upload video into the activity
- Follow the instructions below to add the captions track
Interactive Video Captions
Part 1: Download the SRT file for the captions
- Find video on Kaltura
- Click on “captions”
- Click on 3 dots at the far right of the srt file and choose “download”
Part 2: Convert the SRT file to a VTT file
Video how-to guide: Don’t Pay to Convert SRT to WebVTT (04:43)
- Open file manager and find the file [optional: Make a copy of the file at this point if you want a backup of the original]
- Right click -> select “open with” -> notepad
- Write WEBVTT at top
- Make sure each section has captions. (if a section has no captions, put “music” or something. Can’t leave it blank.
- Use Edit, Replace to replace all commas with periods
- Save the file and close
- Pull up file in file manager
- Note: Make sure file manager is displaying file extensions, if not, go into view and select that option.
- Edit the file and change the three letter file extension to “.vtt”. (Dismiss the warning message.)
Part 3: Upload the VTT file to H5P Interactive video
- In H5P Interactive video editor, go to the tab labeled “upload/embed video”
- Click on “text tracks” dropdown
- Click the “subtitles” dropdown [do NOT click “add track!”]
- Click “add” button under track source
- Upload vtt file
- Click Save
- IMPORTANT: Captions will only work in “view” mode. Not in “edit” mode. If you want to check to see if the process worked, you will need to be in “view mode”.
H5P Pressbooks Version
This is a partner section to the Pressbooks information.
To add interactivity
- Go to Plugins and Activate H5P
- Go to H5P Content and then click Add New
- There are 51 content types
- Not all of the content types are accessible
- Check the accessibility chart for details
- Click Get or Details
- When you click Details, you can select the content demo
- Tutorials for the content types
- Add H5P to pressbook pages using “Add H5P”
- To add grade passback to a book, you must “register” the book
- Ask Shawn Kemple, Application Administrator and fill out a request for your book
- Make sure the book is enabled
- Create your graded activity
- Place the activity on a pb page
- Make sure that you have completed the activity at least once so that you have a score
- Include in Score Report
- Save the page
- If you only have one assignment
- Copy the launch URL on the pb page
- Paste the URL in the external tool field on your Canvas assignment page
- If you have a larger number of assignments
- Make sure that the pags have “Show in exports” checked
- Export > Import content > Select > Common Cartridge 1.x Package > Choose imscc file > select content > import
- Your pages and assignments will show on the module page
- Example book: Rebecca’s Pressbook Examples
Resources
- H5P Rebecca Training 8/30/2022
- Rebecca’s H5P Tips & Tricks Video
- UVU’s H5P
- UEN Digital Press with Pressbooks
Examples
- H5P Examples and Downloads
- You can download the examples and upload into Pressbooks or Standalone versions.
- H5P Tutorials for Authors